Patty’s Suspension Day |
Post Reply 
|
Page <12 |
| Author | ||
Romeo 
Senior Post God 

Joined: 16 November 2008 Location: Canada Status: Offline Points: 3033 |
 Post Options Post Options
 Quote Reply Quote Reply
 Posted: 03 July 2011 at 8:39pm Posted: 03 July 2011 at 8:39pm |
|
|
RETRIBUTION. Unfortunately, I've found once one spam bot finds it's way, it usually opens the flood gates... |
||
|
Never shift into reverse without a back-up plan.
|
||
 |
||
|
Patrick
Newbie 
Joined: 19 April 2008 Location: Vancouver Status: Offline Points: 6 |
Post Options
Quote Reply
Posted: 05 July 2011 at 12:05am |
|
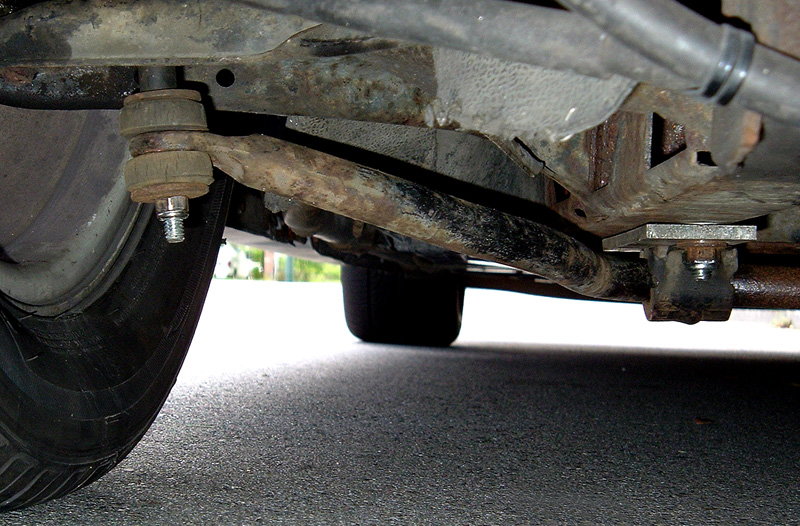
Well, here they are... The first one is actually of my parts car to show what these "cones" are that Gary shortened on the front of my 84's suspension. I had read that taking .75" off was ideal. I wanted to take more off, and we fussed and fiddled to try and do so without bottoming out the shocks. I had forgotten to measure what length the cone was originally, but when we were done, the length had been shortened to 4.5". So how much did we end up shortening these cones? Look at the picture of the uncut cone and figure it out.
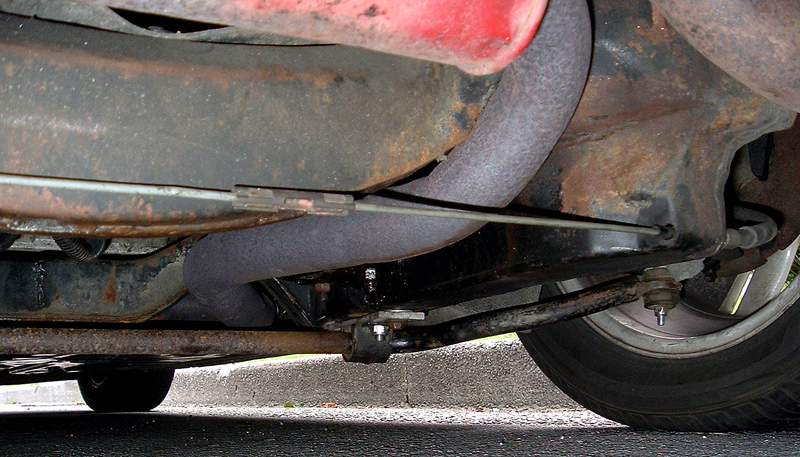
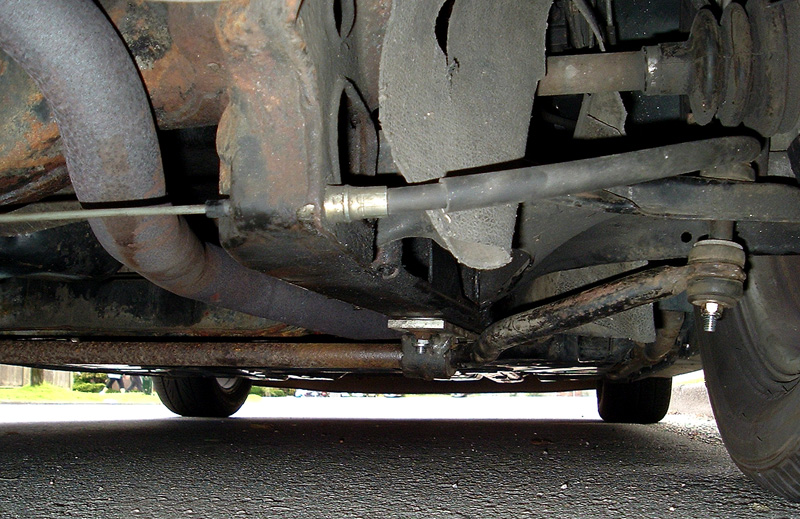
At the bottom of the metal cone is normally a rubber bumper which absorbs any impact if the supension bottoms out. The bumper had been removed prior to this picture being taken, but they're both definitely on my '84. I was quite pleased how well we got the transplanted front sway bar to fit in the back. There were holes already in the control arms in the correct location that only required being made a bit larger. The end link "tubes" were cut down to I believe the width of Gary's finger, and everything lined up great. Notice the "tabs" on the end of the sway bar arms and how parallel they are to the rubber bushings on the end links. Almost perfect!
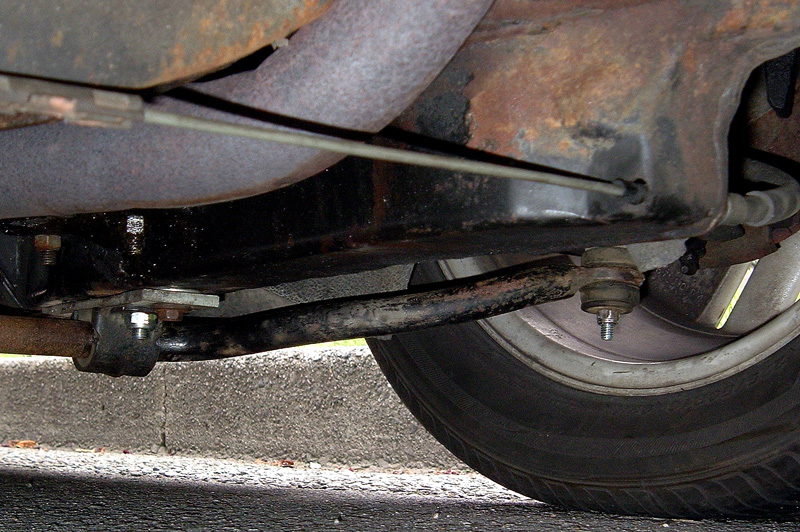
You'll notice in this shot how there are NO problems with clearance between the head of the end link bolts and the rubber boot of the CVs. No need to cut the top rubber bushing down, lots of room.
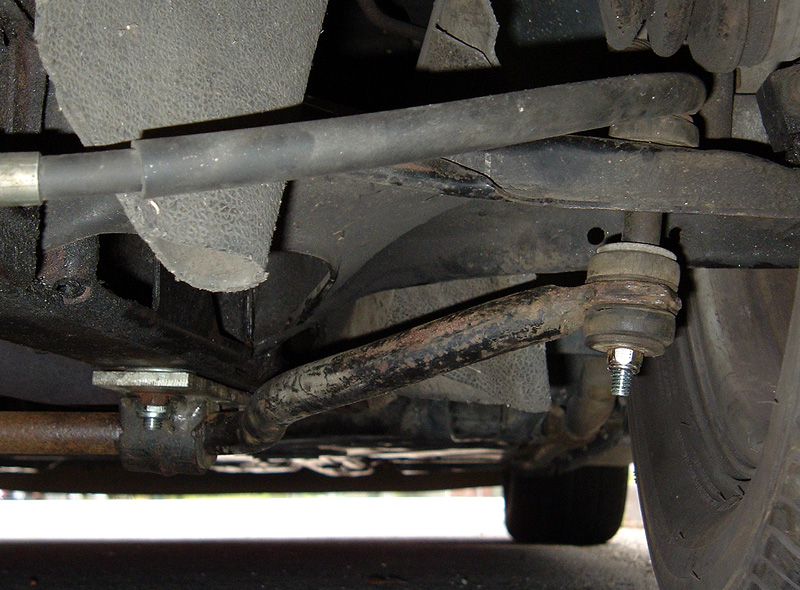
The only thing that would've made the job easier would've been if the spacers weren't required for the sway bar mounting brackets, but the holes for them would've required drilling up through the cradle into the control arm bushings. That obviously wouldn't have worked, so using the spacers allowed us to spread the bracket mounting holes further apart, thus avoiding the control arm bushings. (The spacers also allow for more clearance between the sway bar and the exhaust pipe on systems that may require it.) Again, thanks to Gary for being so patient and for doing such a nice job!
|
||
|
||
|
Romeo
Senior Post God
Joined: 16 November 2008 Location: Canada Status: Offline Points: 3033 |
Post Options
Quote Reply
Posted: 05 July 2011 at 10:53am |
|
|
I love those spacer plates, they look so beefy.

|
||
|
Never shift into reverse without a back-up plan.
|
||
|
||
|
Patrick
Newbie
Joined: 19 April 2008 Location: Vancouver Status: Offline Points: 6 |
Post Options
Quote Reply
Posted: 05 July 2011 at 11:10am |
|
|
Well yeah, there's a lot of power to harness with this baby.
|
||
|
||
|
karnak
Senior Member 
Joined: 28 August 2009 Location: Canada Status: Offline Points: 349 |
Post Options
Quote Reply
Posted: 05 July 2011 at 12:45pm |
|
|
Patrick, it was fun to do and although a long day, it was worth the time to give your car its suspension back.
 Gary |
||
|
||
|
Romeo
Senior Post God
Joined: 16 November 2008 Location: Canada Status: Offline Points: 3033 |
Post Options
Quote Reply
Posted: 05 July 2011 at 11:34pm |
|
MIGHTY DUKE!! lol Man, that was such a fun day though, thanks again for having us! Haven't had that much fun in a long time. |
||
|
Never shift into reverse without a back-up plan.
|
||
|
||
|
Car-2-Lo
Senior Post God

Joined: 14 February 2007 Location: Canada Status: Offline Points: 1266 |
Post Options
Quote Reply
Posted: 06 July 2011 at 7:59pm |
|
|
Hey Patty, do you have after pic showing shorten cone or where was the cut made ? Thanks Johnny-B-Good 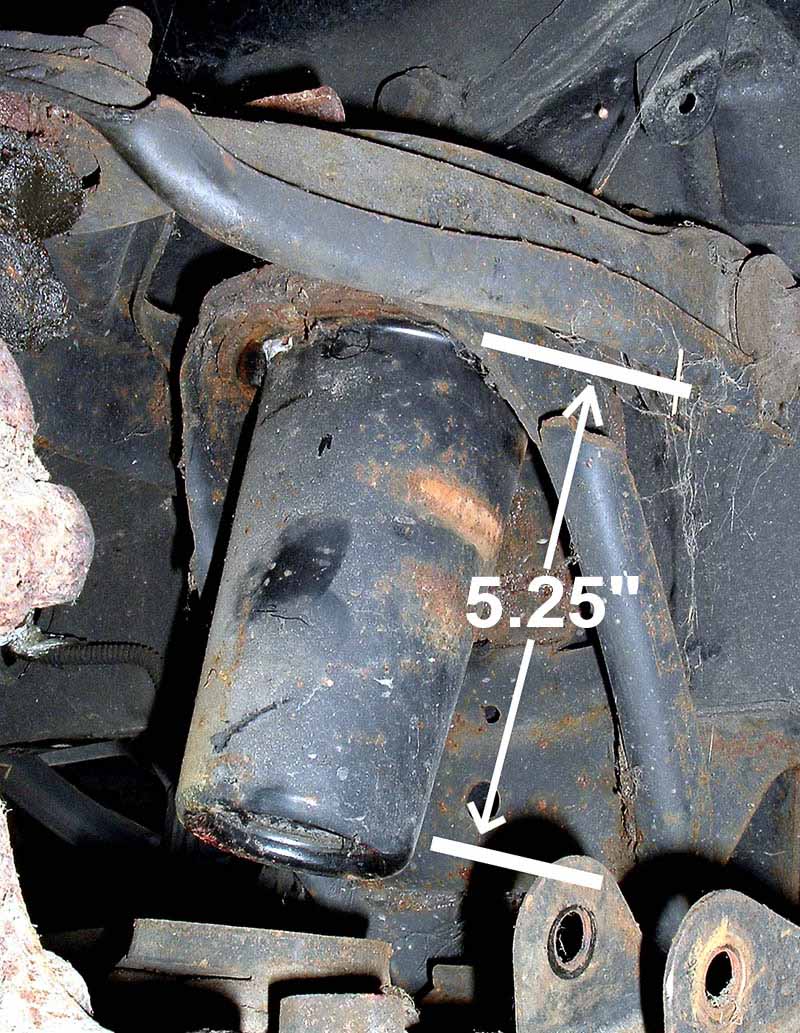
|
||
|
||
|
karnak
Senior Member
Joined: 28 August 2009 Location: Canada Status: Offline Points: 349 |
Post Options
Quote Reply
Posted: 06 July 2011 at 8:53pm |
|
|
the cut was made about 2" up from the bottom
 |
||
|
||
|
Car-2-Lo
Senior Post God
Joined: 14 February 2007 Location: Canada Status: Offline Points: 1266 |
Post Options
Quote Reply
Posted: 06 July 2011 at 9:52pm |
|
Thanks 
|
||
|
||
|
Patrick
Newbie
Joined: 19 April 2008 Location: Vancouver Status: Offline Points: 6 |
Post Options
Quote Reply
Posted: 06 July 2011 at 11:07pm |
|
|
Sorry Johnny, I didn't take my camera out to Abbotsford that day. As Gary said, the cut was about two inches from the bottom. The most important measurement is the .75" you need to remove from more or less the middle of the cone. Basically you want to remove as much as possible and NOT have the shocks bottom out. (We triple-checked and measured without the rubber bumper being in place.)
|
||
|
||
|
Post Reply
|
Page <12 |
 Tweet
Tweet
|
| Forum Jump | Forum Permissions You cannot post new topics in this forum You cannot reply to topics in this forum You cannot delete your posts in this forum You cannot edit your posts in this forum You cannot create polls in this forum You cannot vote in polls in this forum |


 Topic Options
 Patrick wrote: